A few weeks ago, I was presented with a special opportunity to push Mail Merge to the limits with Salesforce, Conga Composer, and Microsoft Word. As many of you know, over the last year or so, I have been developing help videos and open-source style documentation for common Mail Merge scenarios using popular products like Apsona and Conga. However, in today’s post, I’m ONLY going to talk about MS Word. The way you chose to get the data to appear is up to you (heck, you can even do Mail Merge with just MS Excel and MS Word). But once you are in MS Word, how can you get your data and tables to show up properly? Read ahead for what I’m learning and how you can try it!
Why? So what? Well, if I’m typing into a regular Word Doc, I can insert page breaks, add a few “enters”/”carriage returns” to move my curser to the top of the next page, or adjust my margins a bit to ensure that my text fits on the page in a way that seems natural. For example, it would be silly for a Table to have 4 rows on page 1 and only 1 row on page 2 of a document! If I was typing, I would probably do something to bring the whole table onto Page 1, or put in a page break so that the whole table displays on Page 2. This is a lot more difficult to do in “mail merge” scenarios where the amount of data varies from output to output. So, we need to rely on some lesser-known features of MS Word that create consistent formatting rules no matter how the data show up.
Prevent splitting tables or paragraphs across pages or columns in MS Word
I gave you a teaser for this problem in the paragraph above. It looks downright silly, wasteful, confusing, or even embarrassing to have tables split across pages, or paragraphs continuing in odd ways. If you need to set parameters for how text flows onto the next page or column, use the “Paragraph” menu. (Get there by highlighting text and right clicking, then select Paragraph in the menu).
Some of these choices are not obvious. This blogger did a great job elaborating on the difference between “keep with next” and “keep lines together.”

These settings worked well for PARAGRAPH text but did not do the trick for TABLES. I used a couple of different methods to fix this problem.
- In Table Properties > Row, I “unclicked” the setting to “allow row to break across pages”
- I also selected Table and its preceding text and selected the “Paragraph” menu option described above. Then, I selected, “Keep with next.” This ensured that the Table and the “introductory text” above the table were “joined” together and not split between pages or columns.
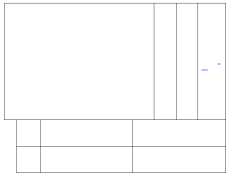
- Finally, I joined two tables together instead of having two, consecutive tables that were independently defined. This made sure that the top rows and the bottom rows (when populated with data) would stay next to each other on the page. My blank table looks like: (note there is no space between the top row and the bottom two rows).
Use conditional merge fields to show/hide text in MS Word
There are whole blogs dedicated to the ability to conditionally display data in MS Word using special merge field brackets and specific syntax for “If blah, show zing, otherwise, show bloop.”
I ended up using this functionality extensively!
🌶️ Here’s a mild example: You are using Mail Merge to make donor solicitation letters. You want to personalize the letters so that each one starts with “Dear <<FIRST NAME>>.” However, some contacts are missing “first name” in the database. You don’t want to leave the salutation blank… or worse… print out the worse “first name!” Instead, you’d like to print “Dear Friend,” but only for letters where the recipient first name is missing. You can use MS merge field logic to print “First Name” OR “Friend.” In marketing, this is sometimes called a “Fallback code.”
🌶️🌶️ Here’s a more piquant example: You are using Mail Merge to send donor thank you letters. For donors who are in the “Super Duper Inner Circle Club,” you want to add a paragraph about the Super Duper Inner Circle Club. Everyone else should get the same letter, just without that part. You can use MS merge field logic to show/hide that paragraph depending on the Super Duper status of the recipient!
🌶️🌶️🌶️🌶️🌶️ Finally, here’s a 5 alarm chili example: You are using Mail Merge to print an annual report. You need to print special text on the first page of the document and the last page of the document. However, you don’t know how many pages each personalized version will have. You can use MS merge field logic and conditional merge fields to evaluate the page you are on and selectively display custom text!
Here’s an educational video where you can learn more about setting up “If” statements and “Merge Fields” in MS Word. If you prefer written instructions, I used this blog post for a refresher.
Prevent “blank row” or “carriage return” in conditional MS Word merge fields
As I was developing conditional merge fields, I noticed a formatting dilemma. If the logic evaluated to false (therefore, print nothing…), I was seeing an empty line in my Word doc. This was making my doc unnecessarily long with lots of empty space. I began to feel very frustrated. How to get these lines to go away?
Finally, I learned by scrolling through MS Word help forums (the power of community!!!) that I needed to start my conditional field at the end of the previous line and INCLUDE THE “ENTER” INSIDE THE CONDITIONAL LOGIC.
In the image below, you can see that the conditional IF merge field starts at the end of the previous line (redacted!). If there is no data in the special field, the IF logic evaluates to nothing. If there IS data in the special field, we open the quotation marks, PRESS ENTER, and then start the text. This ensures that the new text begins on the next line, and if there is no text, there is no blank line. Voila!

Show conditional text based on page number in MS Word
In the Mail Merge blog-o-sphere, it is fairly common to see posts about lining up “nested IF statements” or IF statements with multiple criteria. However, what I needed to do here was evaluate ONE merge field as a criterion for printing a different one. HUH?! This relates to the scenario I described above, where I needed to print certain text on the First and Middle pages of a doc and then special text on the Last Page.
First, it’s helpful to know here that MS Word technically “thinks” that Page Numbers are “merge fields.” They have similar properties as other “calculated values” that you “insert” into a doc.
In the screenshot below, you can see that I am evaluating “Page” (this means the current page) and “Num Pages” (this means total pages in the doc). The operator “< >” means “not equal to. So, in human language, we are saying, “If the page we are on is not the last page, show “Apples.” Otherwise, show “Bananas.”” I popped this badboy into a Footer so that it would appear on every page. This solution expanded on what I learned in this help forum.

Use “picture switch” or “format switch”
I have had SO much fun and SO much success using “picture switch” to change the format of text, numbers, currency, etc in MS Word! Why create extra formula fields for “printer friendly” clean/formatted data when instead, you can put rules right into the Merge Field criteria?
I use this feature to control the number of digits after the decimal point in numbers, formats for dates, and capitalization rules for names. No matter the “incoming” format, we can make sure we have consistent, coherent “outgoing” formatting in our Mail Merge results.
- Blog post with formatting codes for Text
- Blog post with formatting codes for Numbers
Note: some software platforms like Conga Composer have their own formats for “picture switch.”
In conclusion…
I learned soooooooooo much and leveled up *significantly* in complex merge logic through hitting these obstacles and getting past them. Here are some of my top lessons (some of which I learn again… and again… and again…)
- MS Word is way more powerful than I give it credit for
- Time is the best medicine. Walk away and come back with a fresh perspective
- Most questions on esoteric problems in Microsoft Office Suite have been answered. But, using the right keywords to get to those answers can be tricky.
- Community, community, community – forums, youtube, blogs, etc help immensely!
- Stay humble. When you reach a mountain peak, there’s always a taller mountain to climb
- Mail Merge continues to be SO COOL and IMPORTANT!
Last, but not least, good job SELF for all of this technical learning!
